...
...
Leningrad Oblast


Region
Leningrad Oblast
Area
96 m²
Duration
5 day's
Cost
5 000 rub/m²
Frame houses with wooden interior cladding and large panoramic windows and doors leading to a terrace require a carefully designed heating system. Underfloor heating compensates for heat loss through glazing and ensures even warmth throughout the space.
1. Subfloor Preparation and Thermal Insulation
Extruded polystyrene boards (“Penoplex”) 40 mm thick were laid on the rough floor. In a frame house, high-quality floor insulation is especially important — without it, heat would escape through the floor into the crawl space. The boards were installed tightly across the entire floor area.
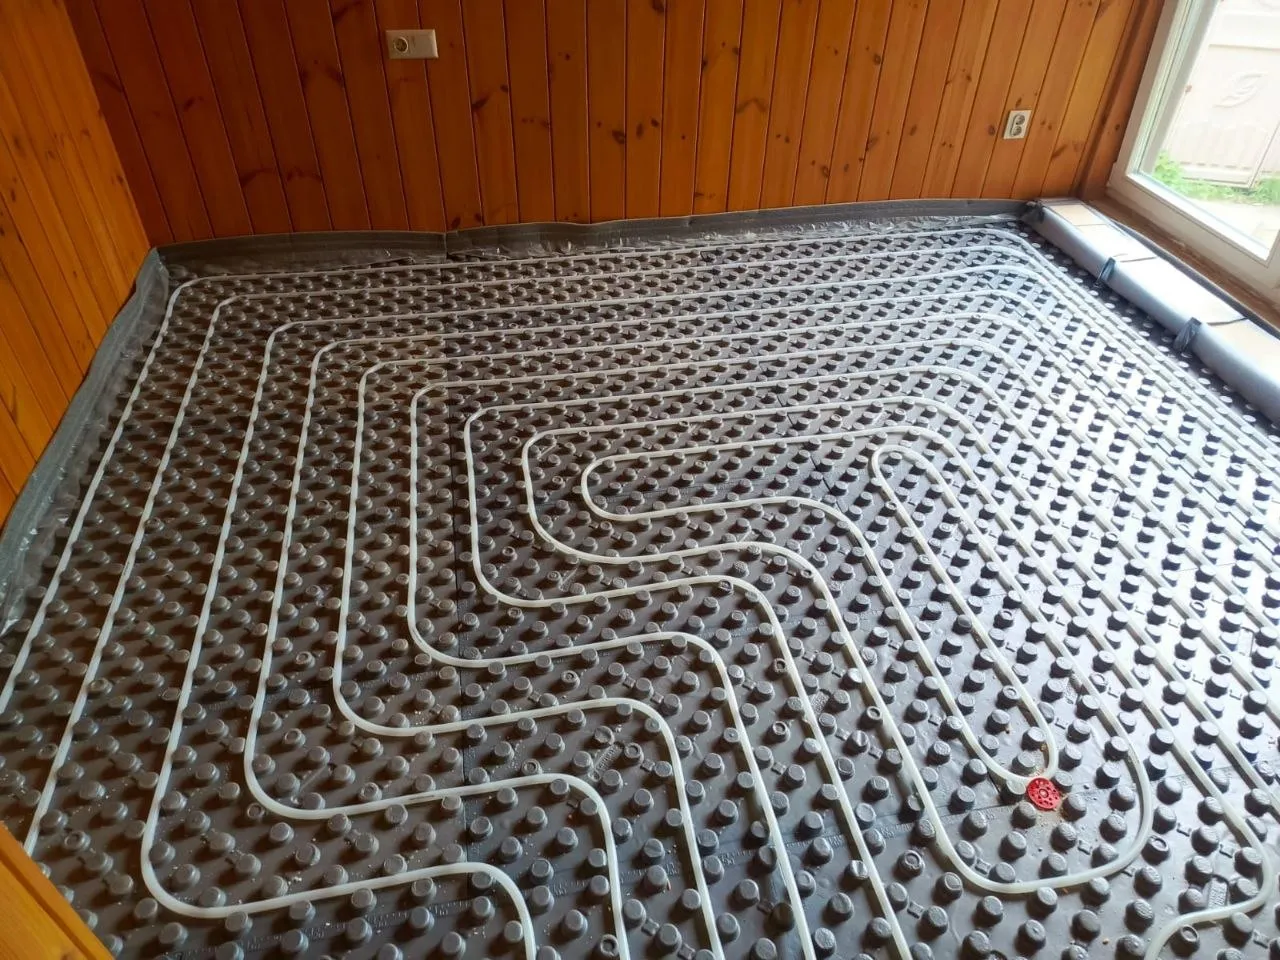
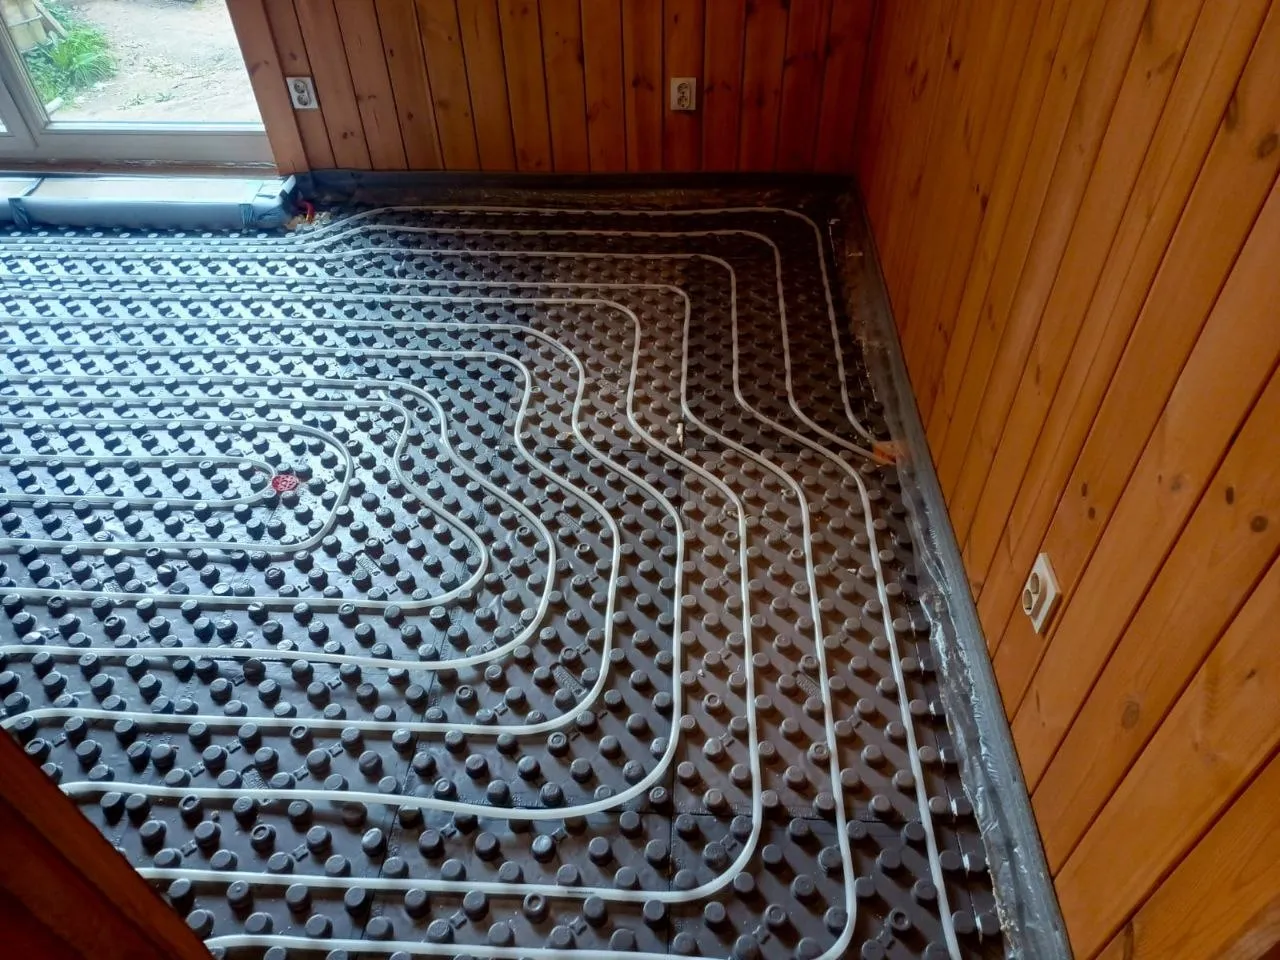
2. Installation of Profiled Mats
Profiled installation mats with studs were placed on top of the insulation. These mats are a modern alternative to reinforcement mesh: the studs securely hold the pipes at the required spacing without additional fasteners. The pipes simply snap between the studs, speeding up installation and preventing displacement during screed pouring.
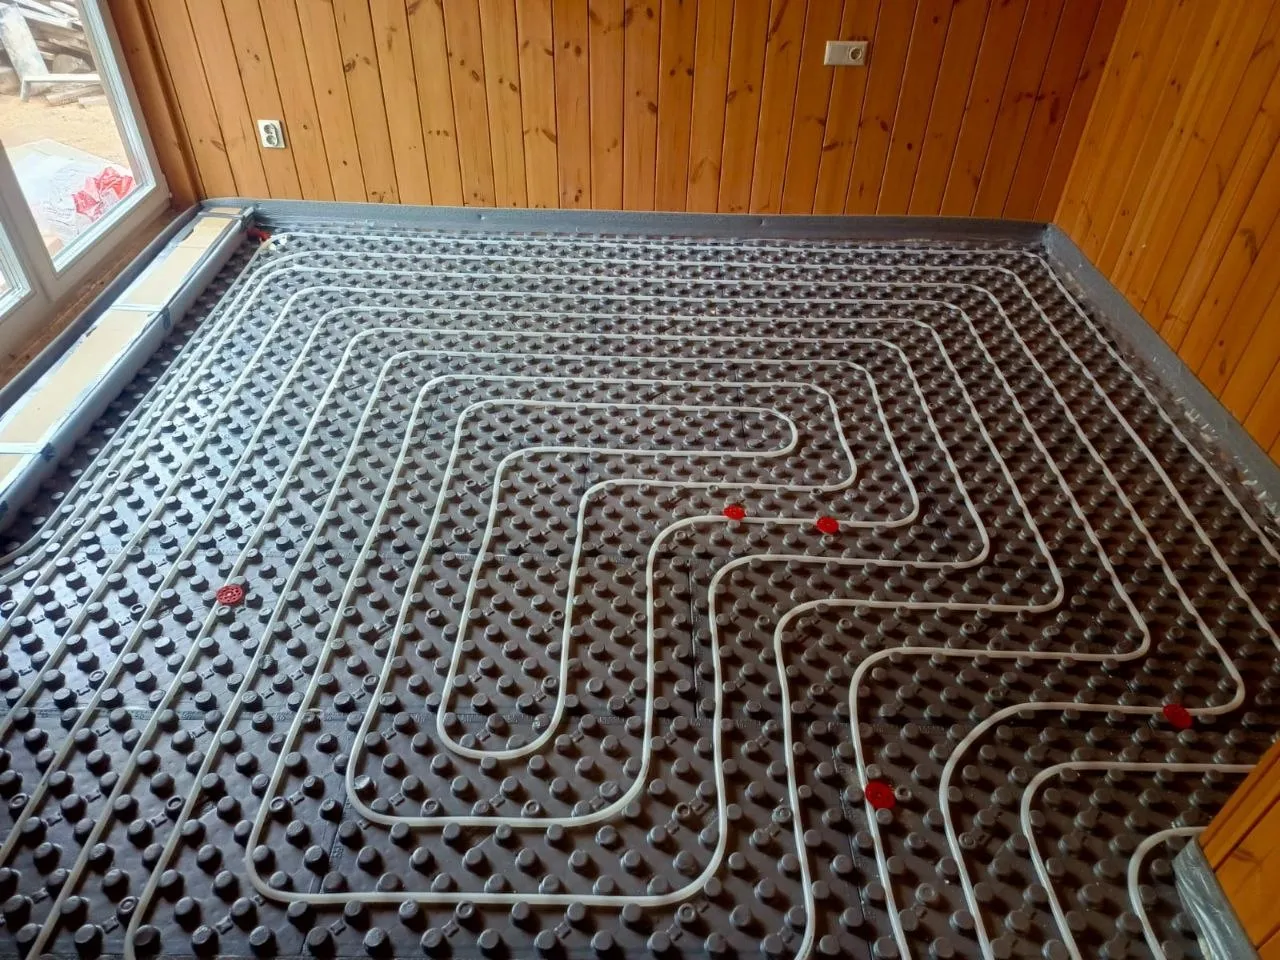
3. Pipe Laying
White PE-Xa pipes were installed in a “spiral” layout with a 200 mm spacing. The spiral layout was chosen for maximum even heat distribution — hot supply and cooler return run parallel, equalizing temperature across the floor. Pipes are gently bent at corners without kinks. Red clips on the mats additionally secure the pipes at bends.
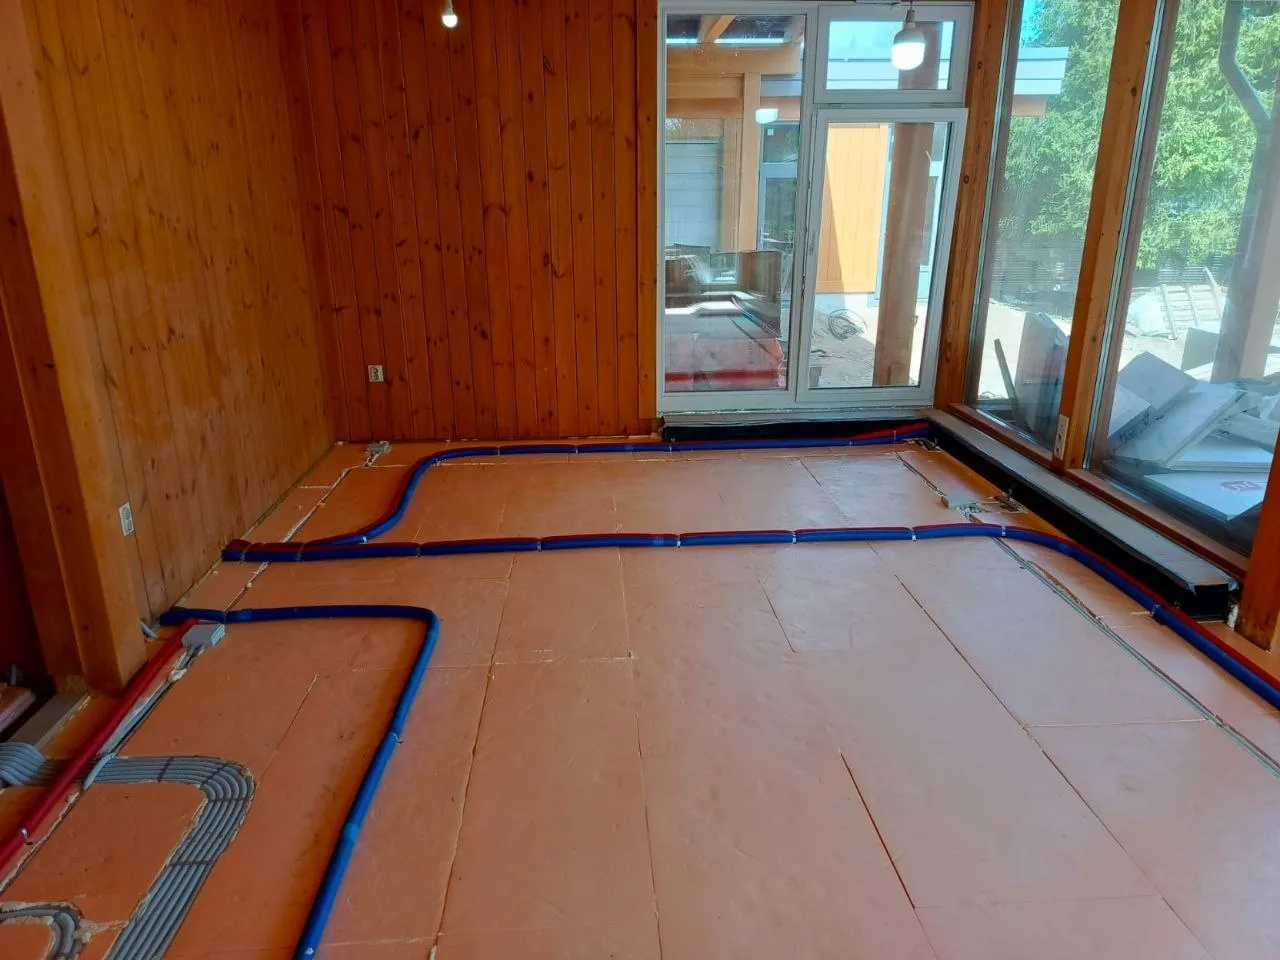
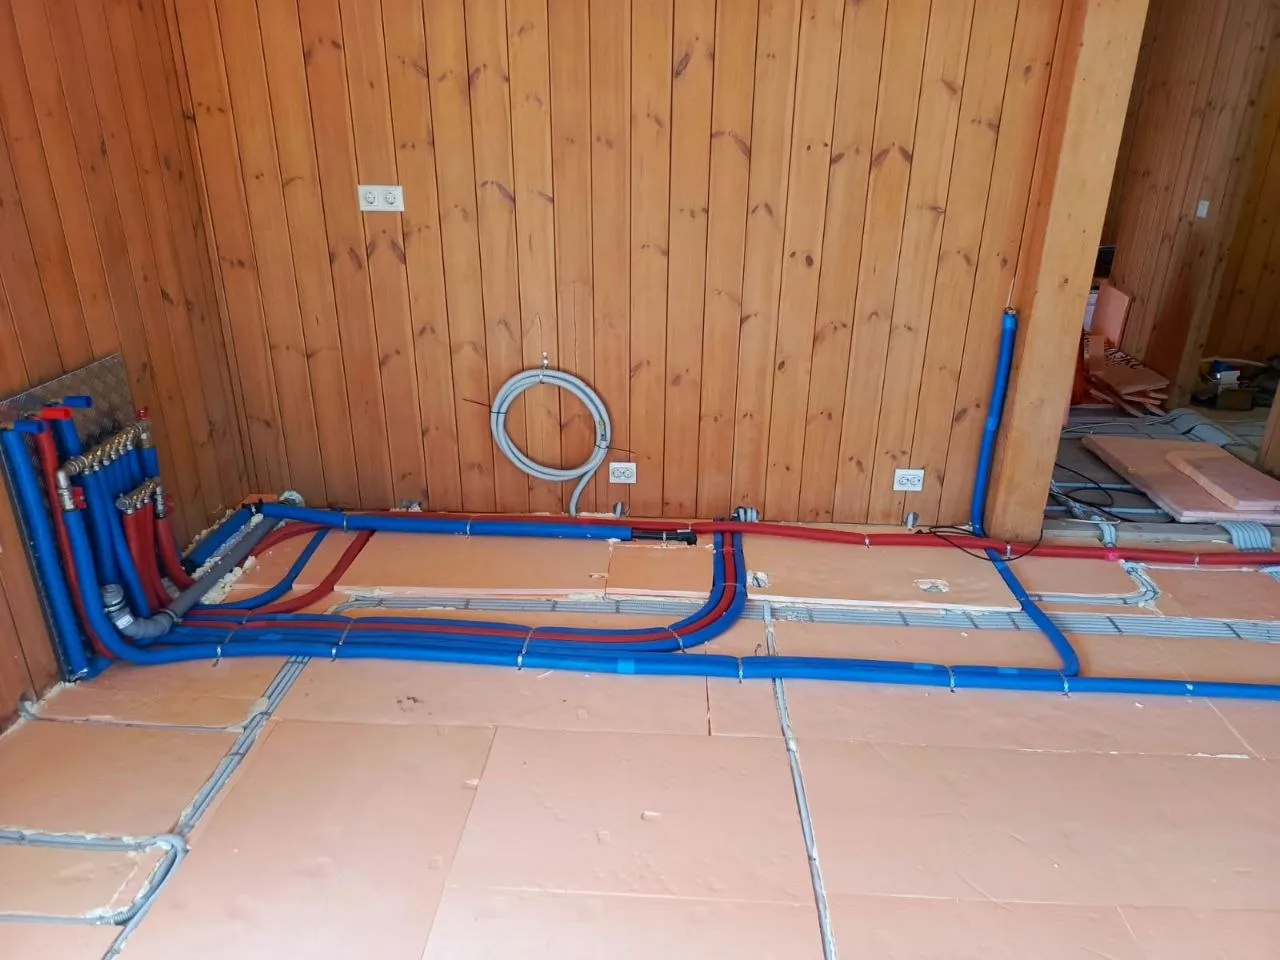
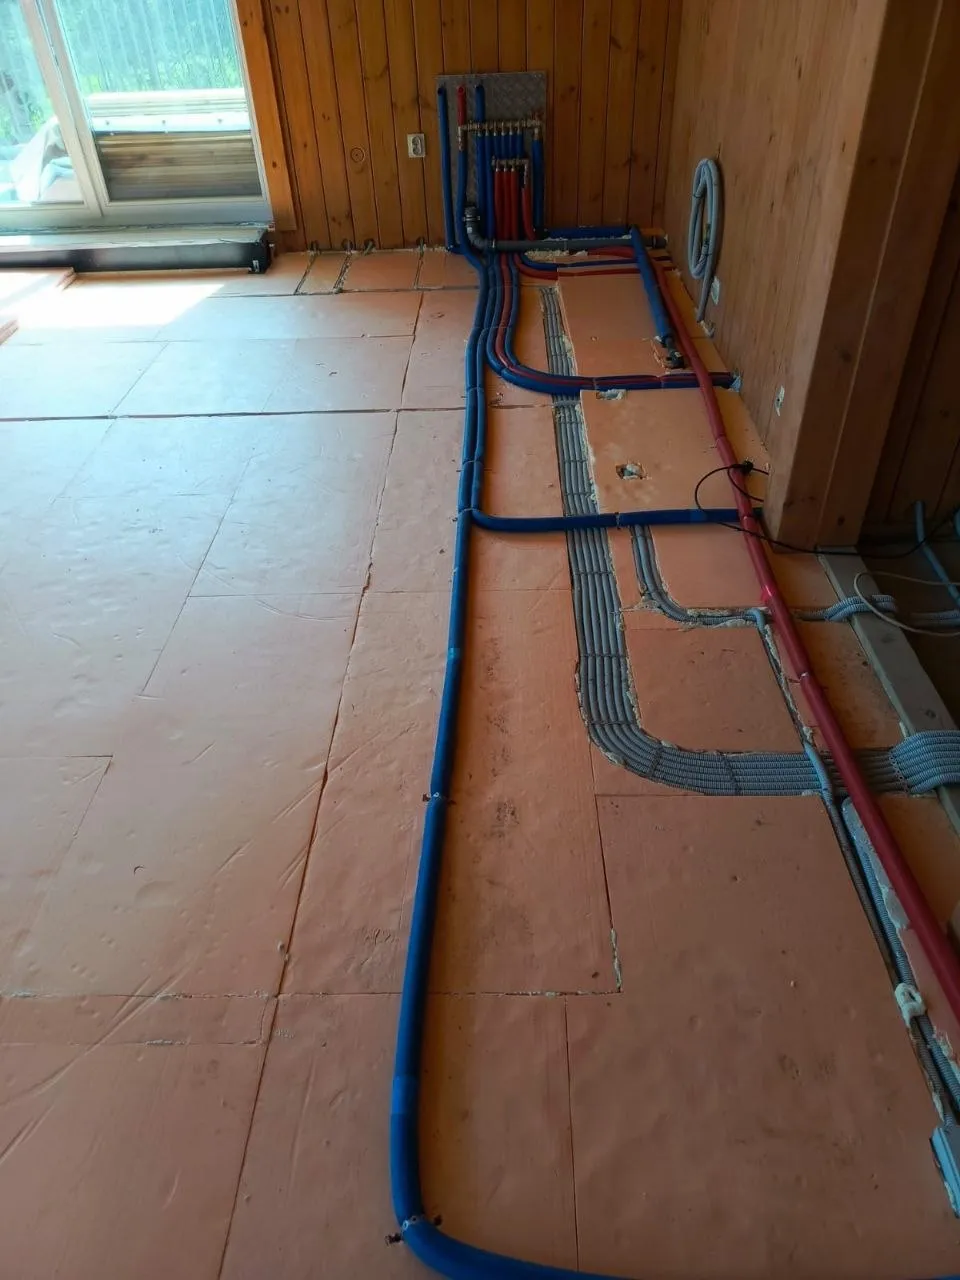
4. Main Pipe Routing
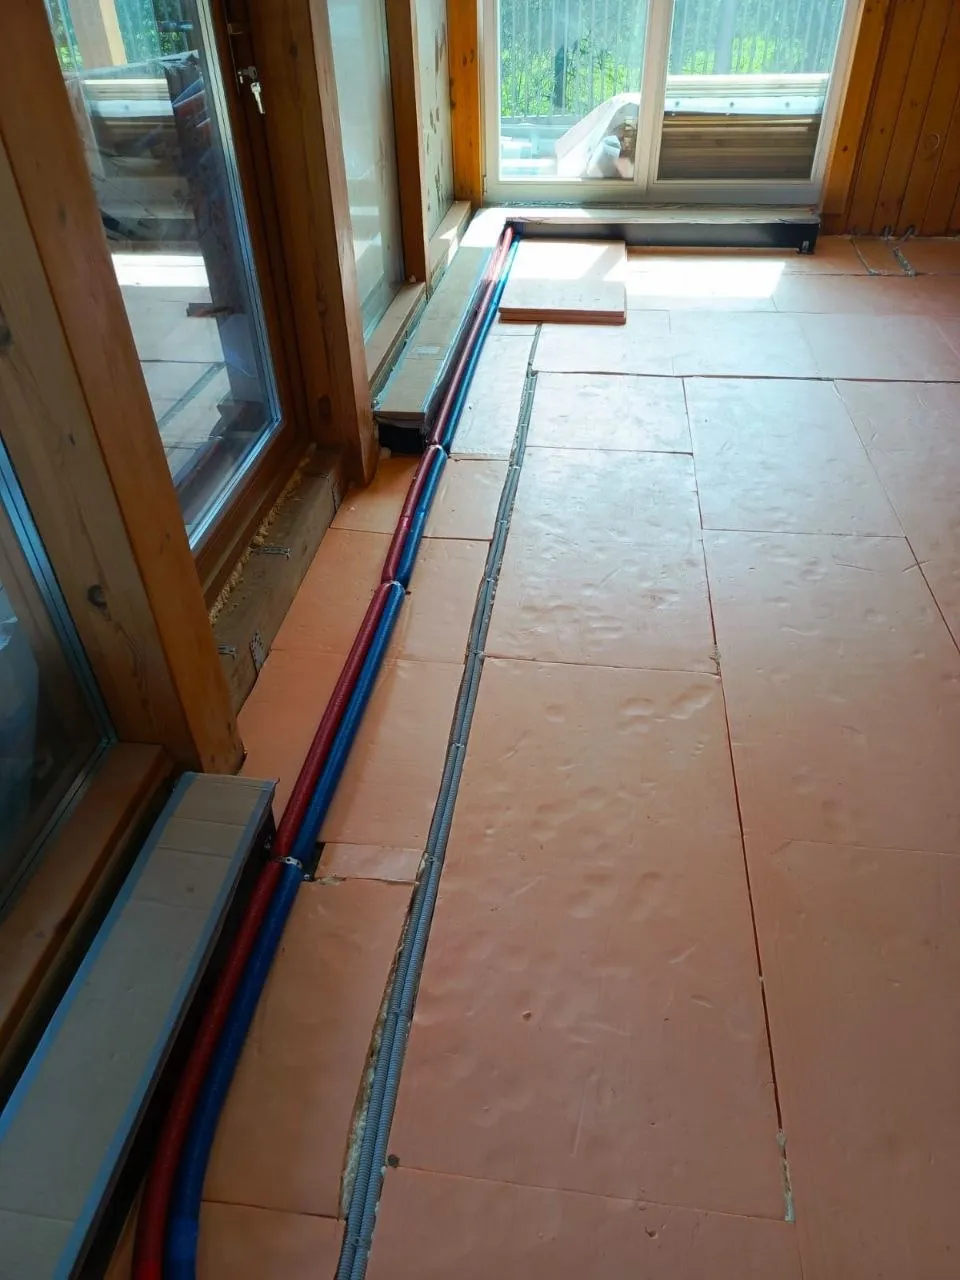
From each underfloor heating loop, supply (red) and return (blue) pipes were routed to the manifold location. Pipes run along the walls inside protective corrugated conduits to prevent damage during screed pouring and allow for thermal expansion. Along panoramic windows, pipes are recessed in channels and covered with protective casing.
5. Pipe Passages Through Walls
Supply and return pipes pass through insulated frame walls inside thermal sleeves. Penoplex and wooden cladding protect the pipes from contact with the structure while allowing for thermal expansion.
6. Manifold Installation
The manifold was mounted on a wall, connecting all loops. Supply (red) and return (blue) pipes, along with a gray corrugated hose to the expansion tank, are connected. Each loop is equipped with an individual regulator for independent temperature control in each room.
7. Pressure Testing
Before screed pouring, the system was filled with heat carrier and pressurized for leak testing of all connections, loops, and components.
Lightweight walls require efficient heating without bulky radiators
Panoramic glazing increases heat loss — underfloor heating evenly compensates across the entire floor
Wooden interior works perfectly with hidden heating — the system does not interfere with the design
Fast heat-up — frame houses do not store cold in massive walls, so the system reaches operating temperature faster than in brick houses
Get in touch — we'll discuss your project, find the best solution and calculate the cost
Leave a request — we'll contact you, clarify details and offer the best solution for your plot and budget.
Response within 30 minutes
+7921-76-76-76-1
info.stroyinvest24@gmail.com
We'll call back and consult for free